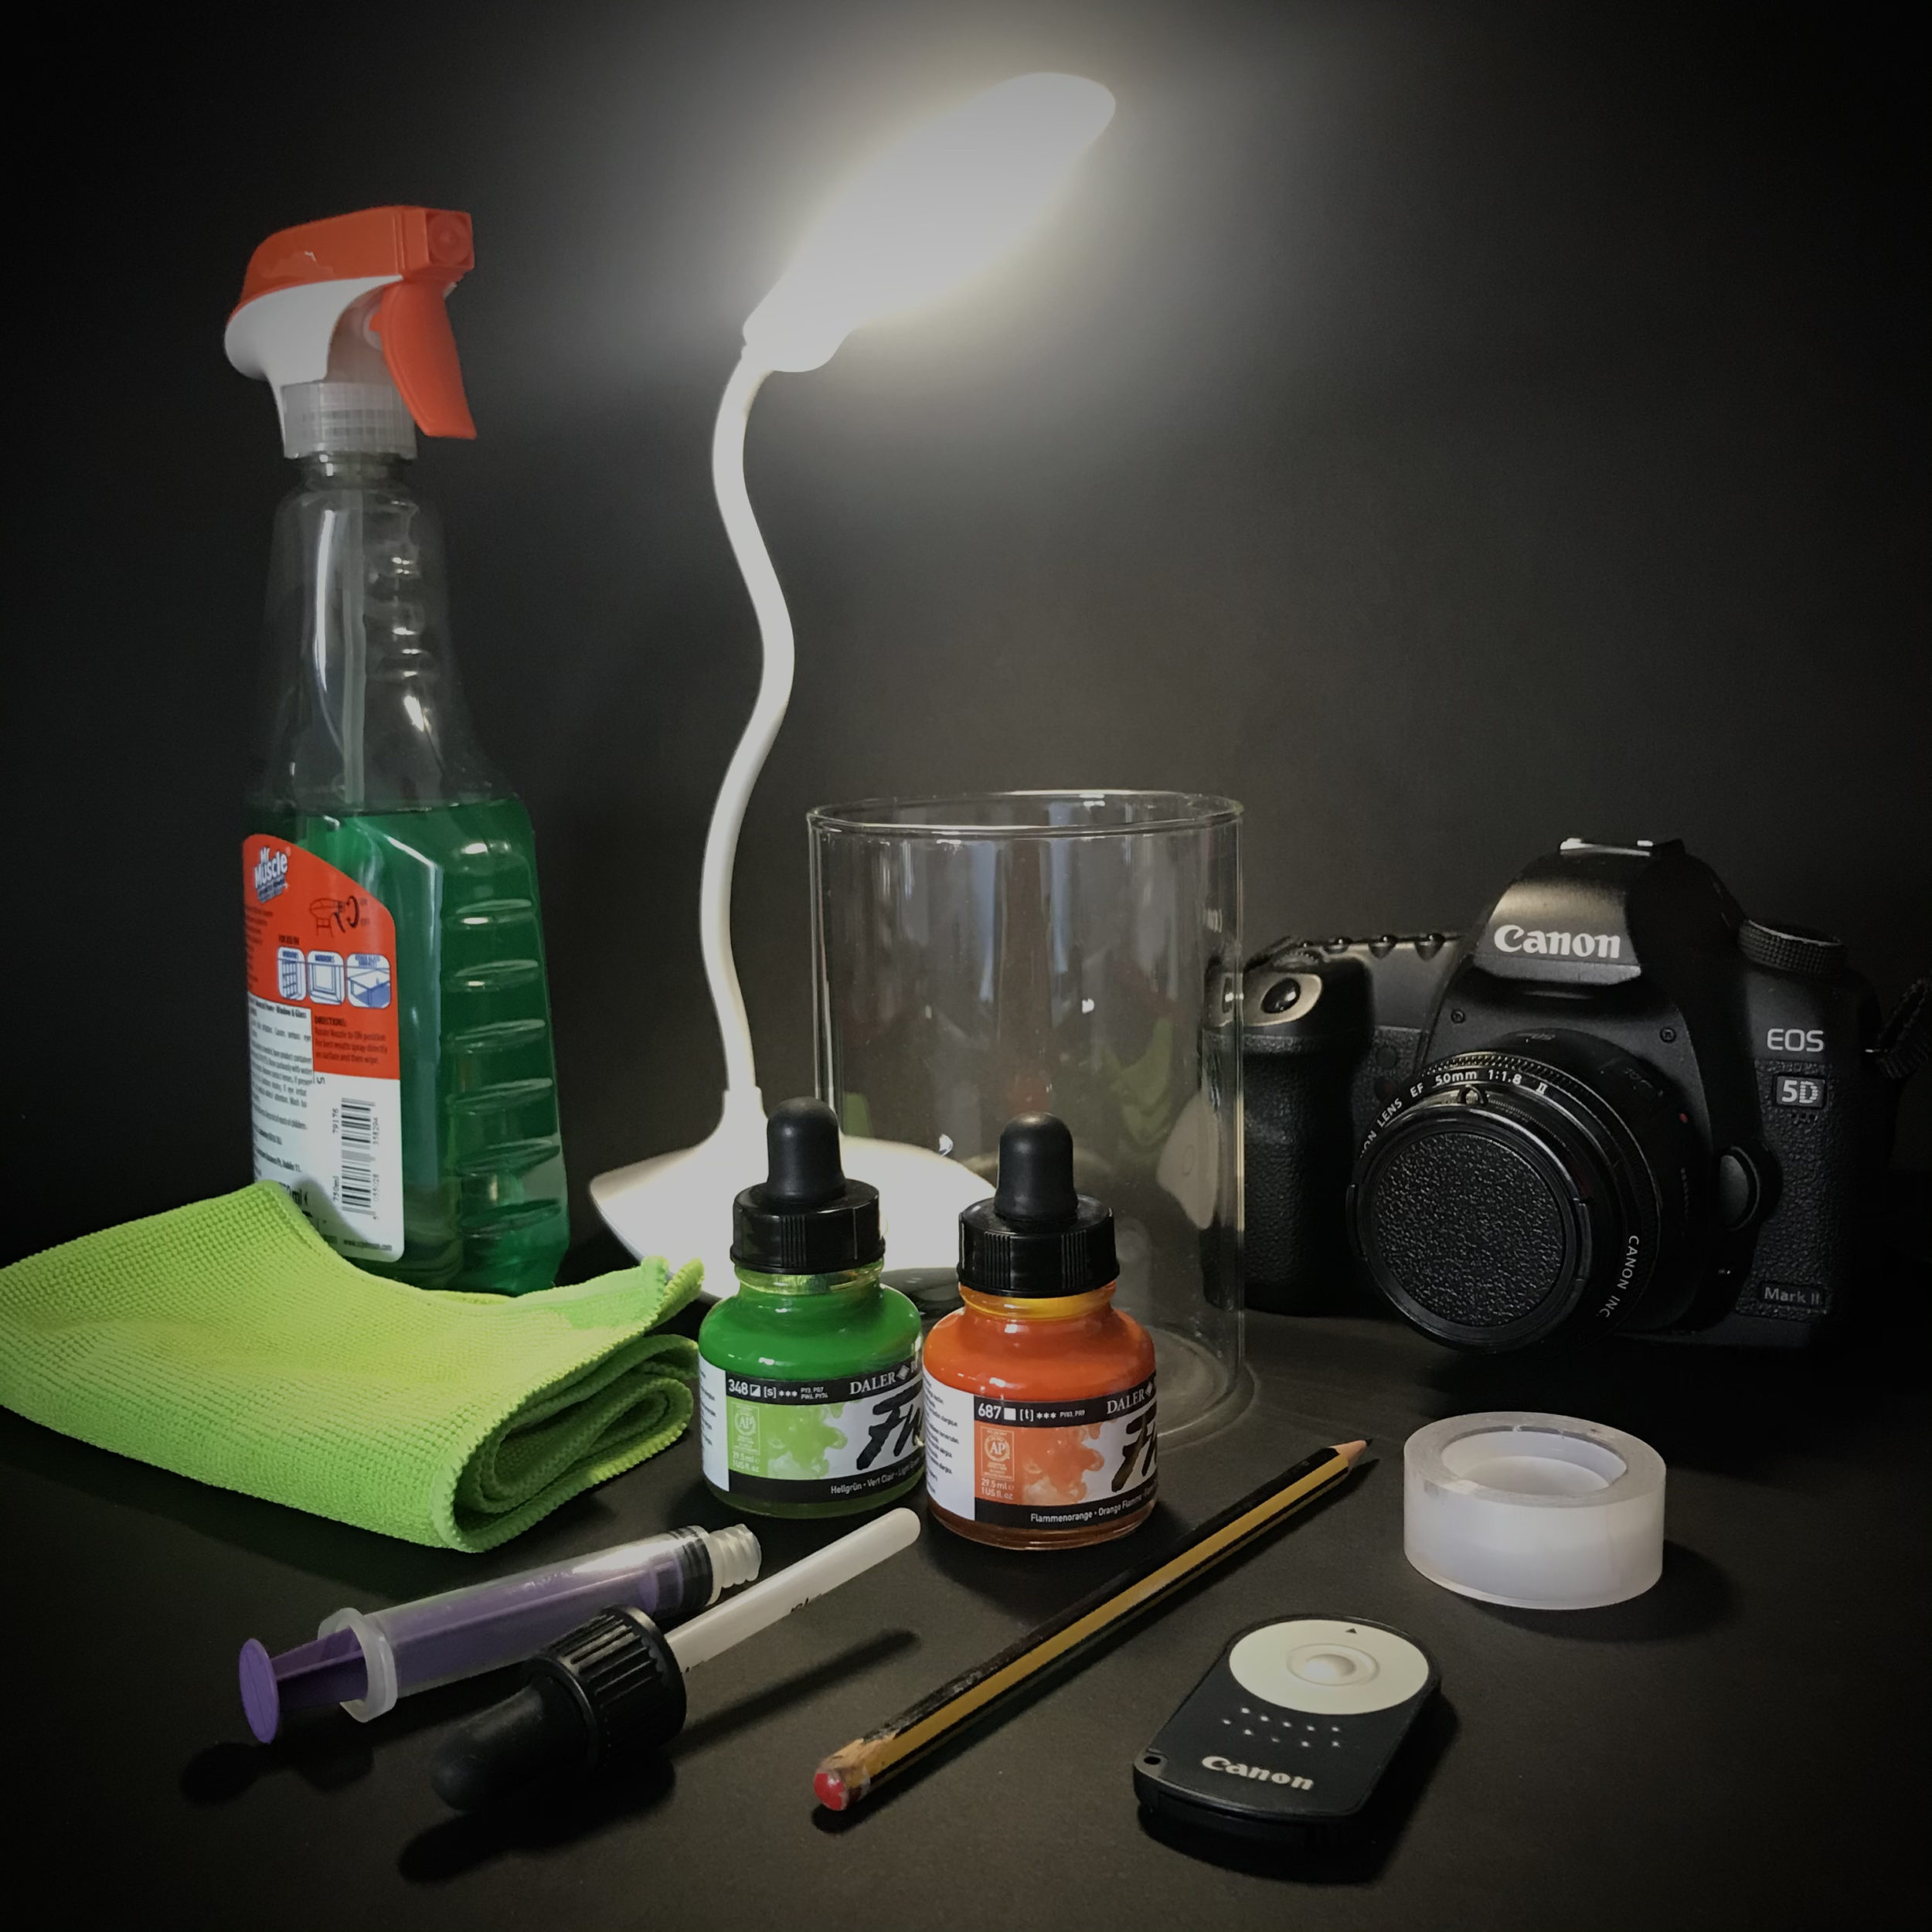
Step 1: You will need...
- Roll of black or white paper to create a backdrop
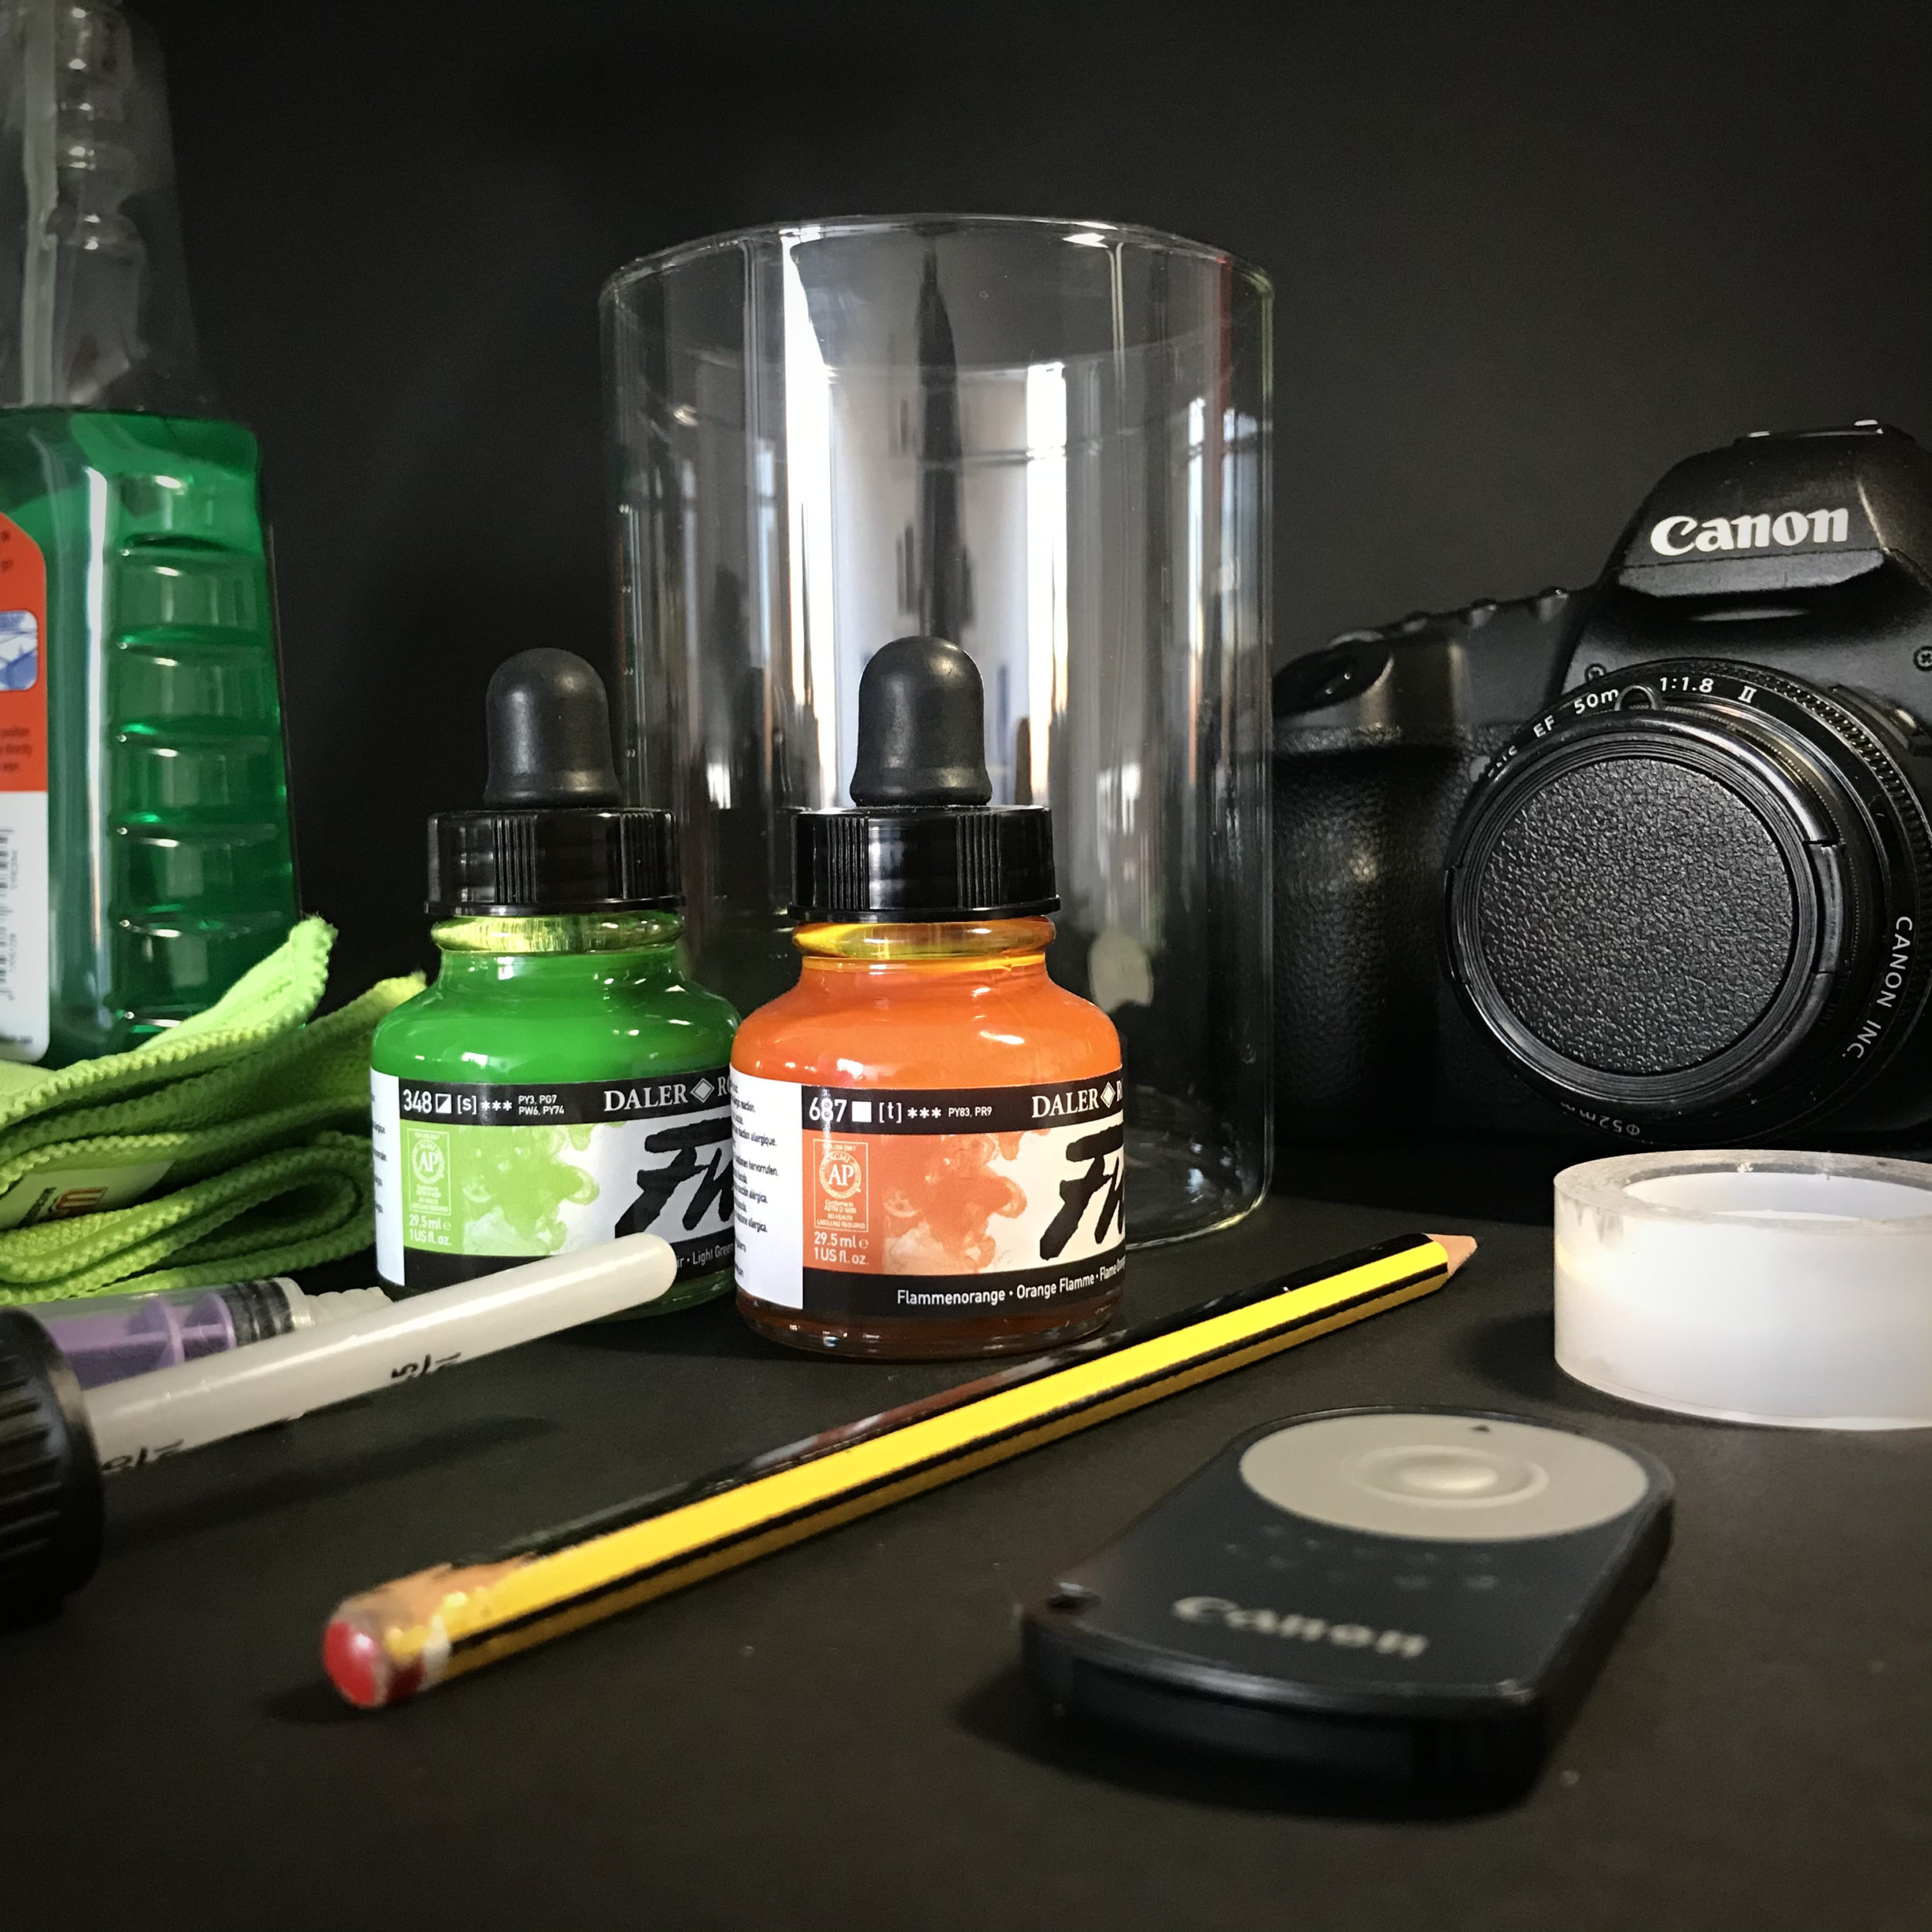
- Glass container (anything from a large jam jar to a fish tank)
- Colourful acrylic ink
- Pipette or syringe, one for each ink colour
- Cold water
- Pencil
- Clear tape
- Scissors
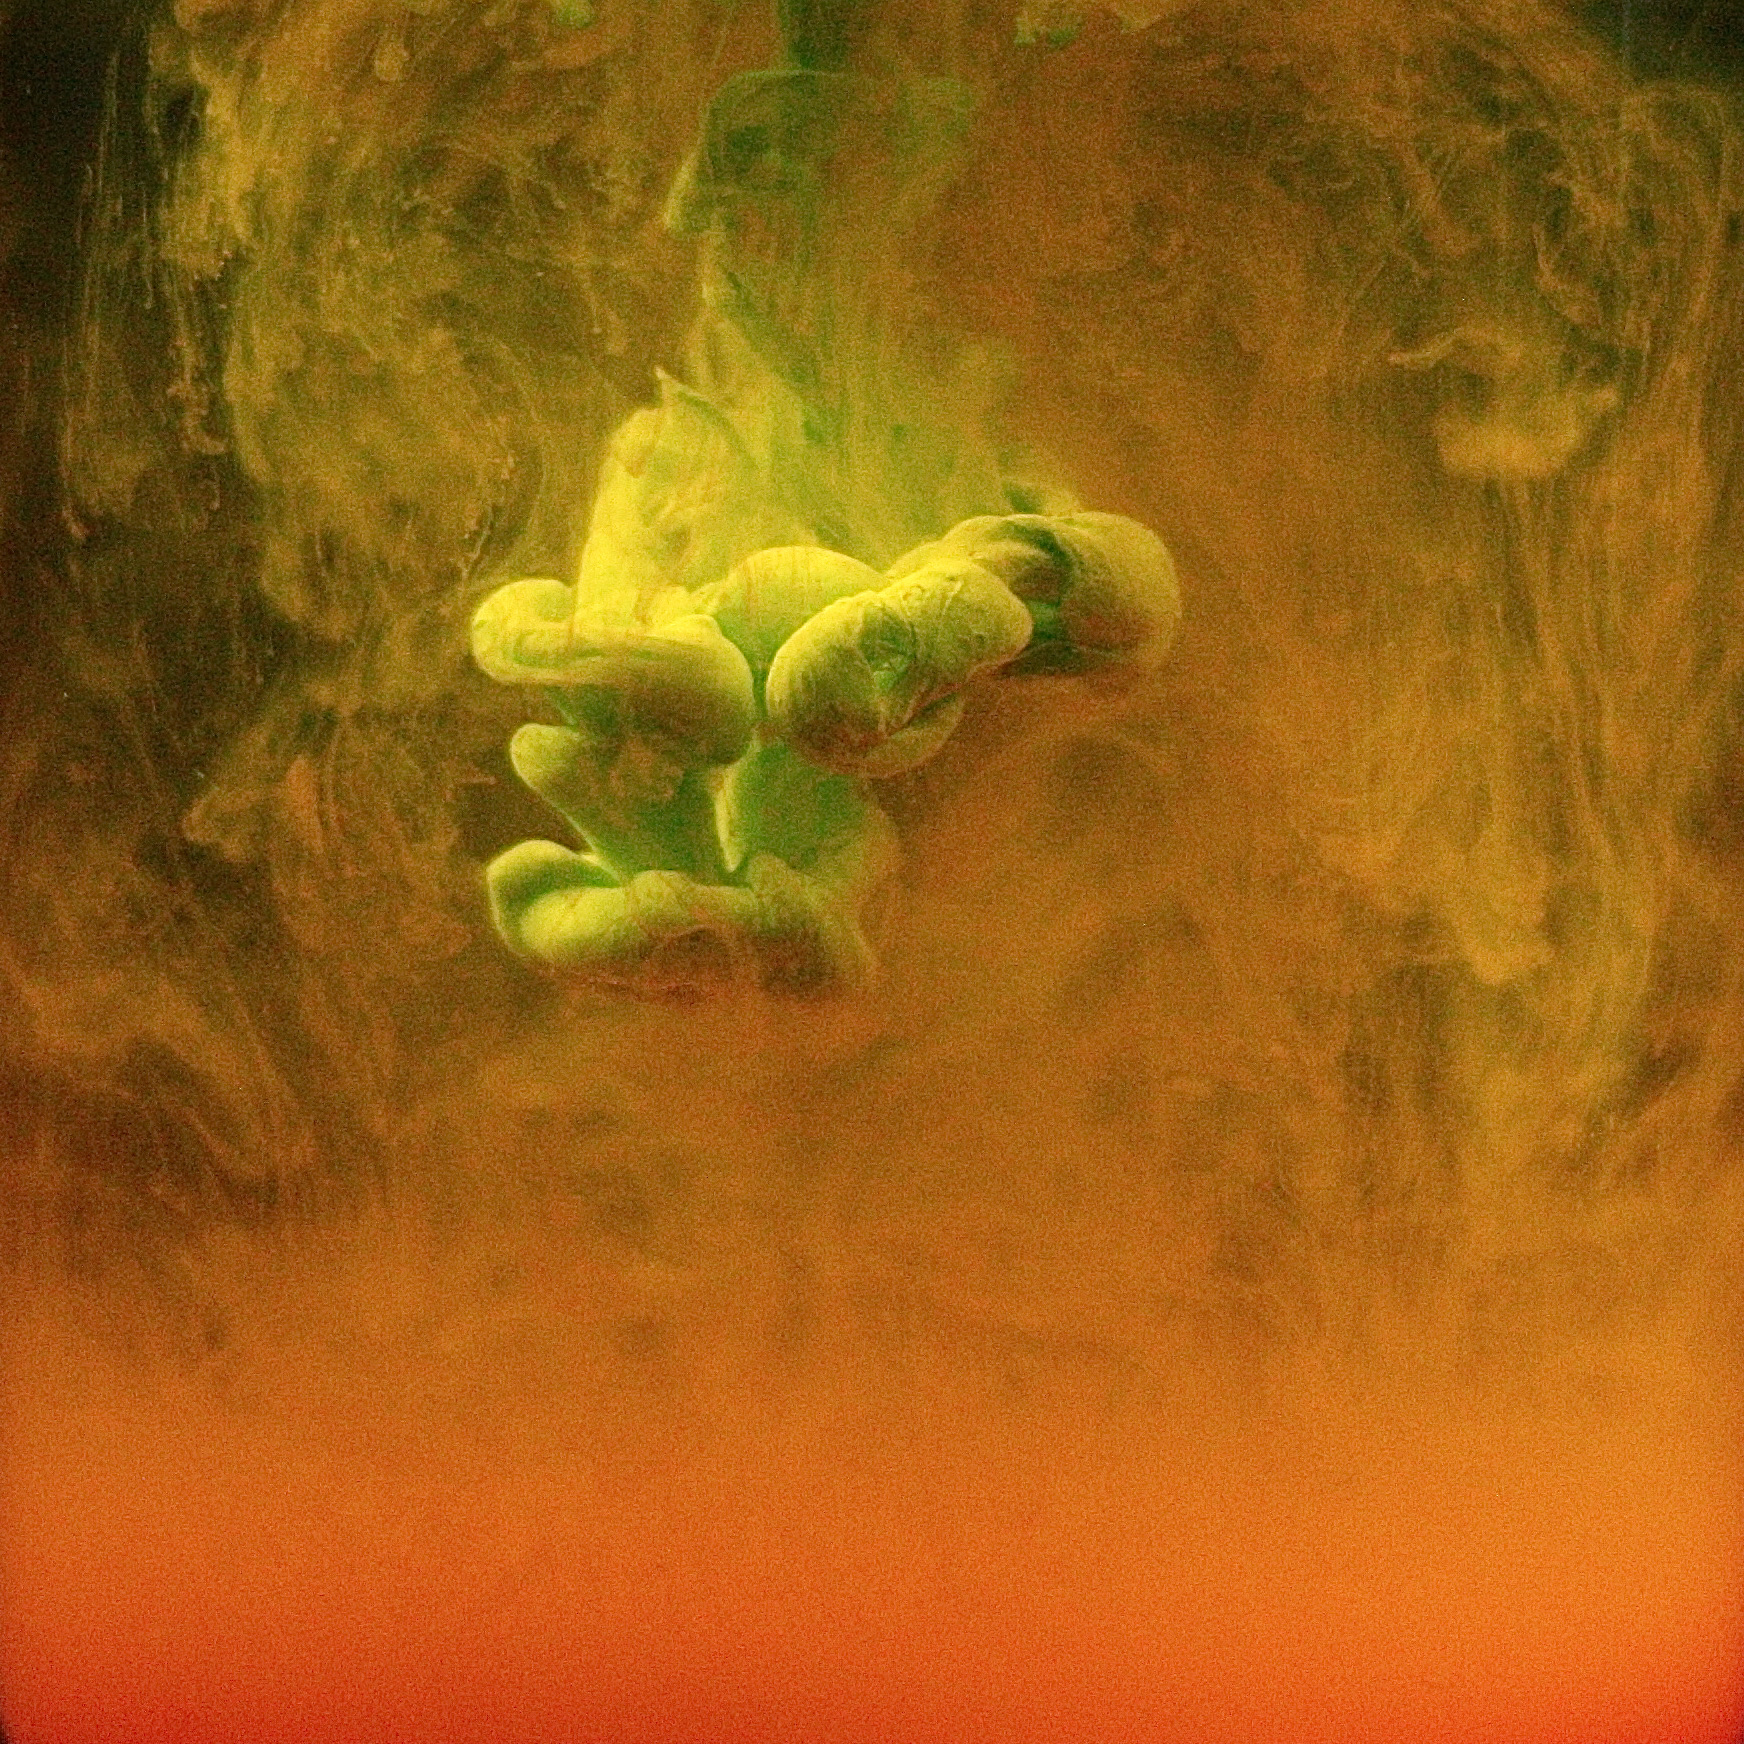
Capture the ethereal magic of ink reacting with water using a few simple tricks.
Resource by Lindsey Smith.
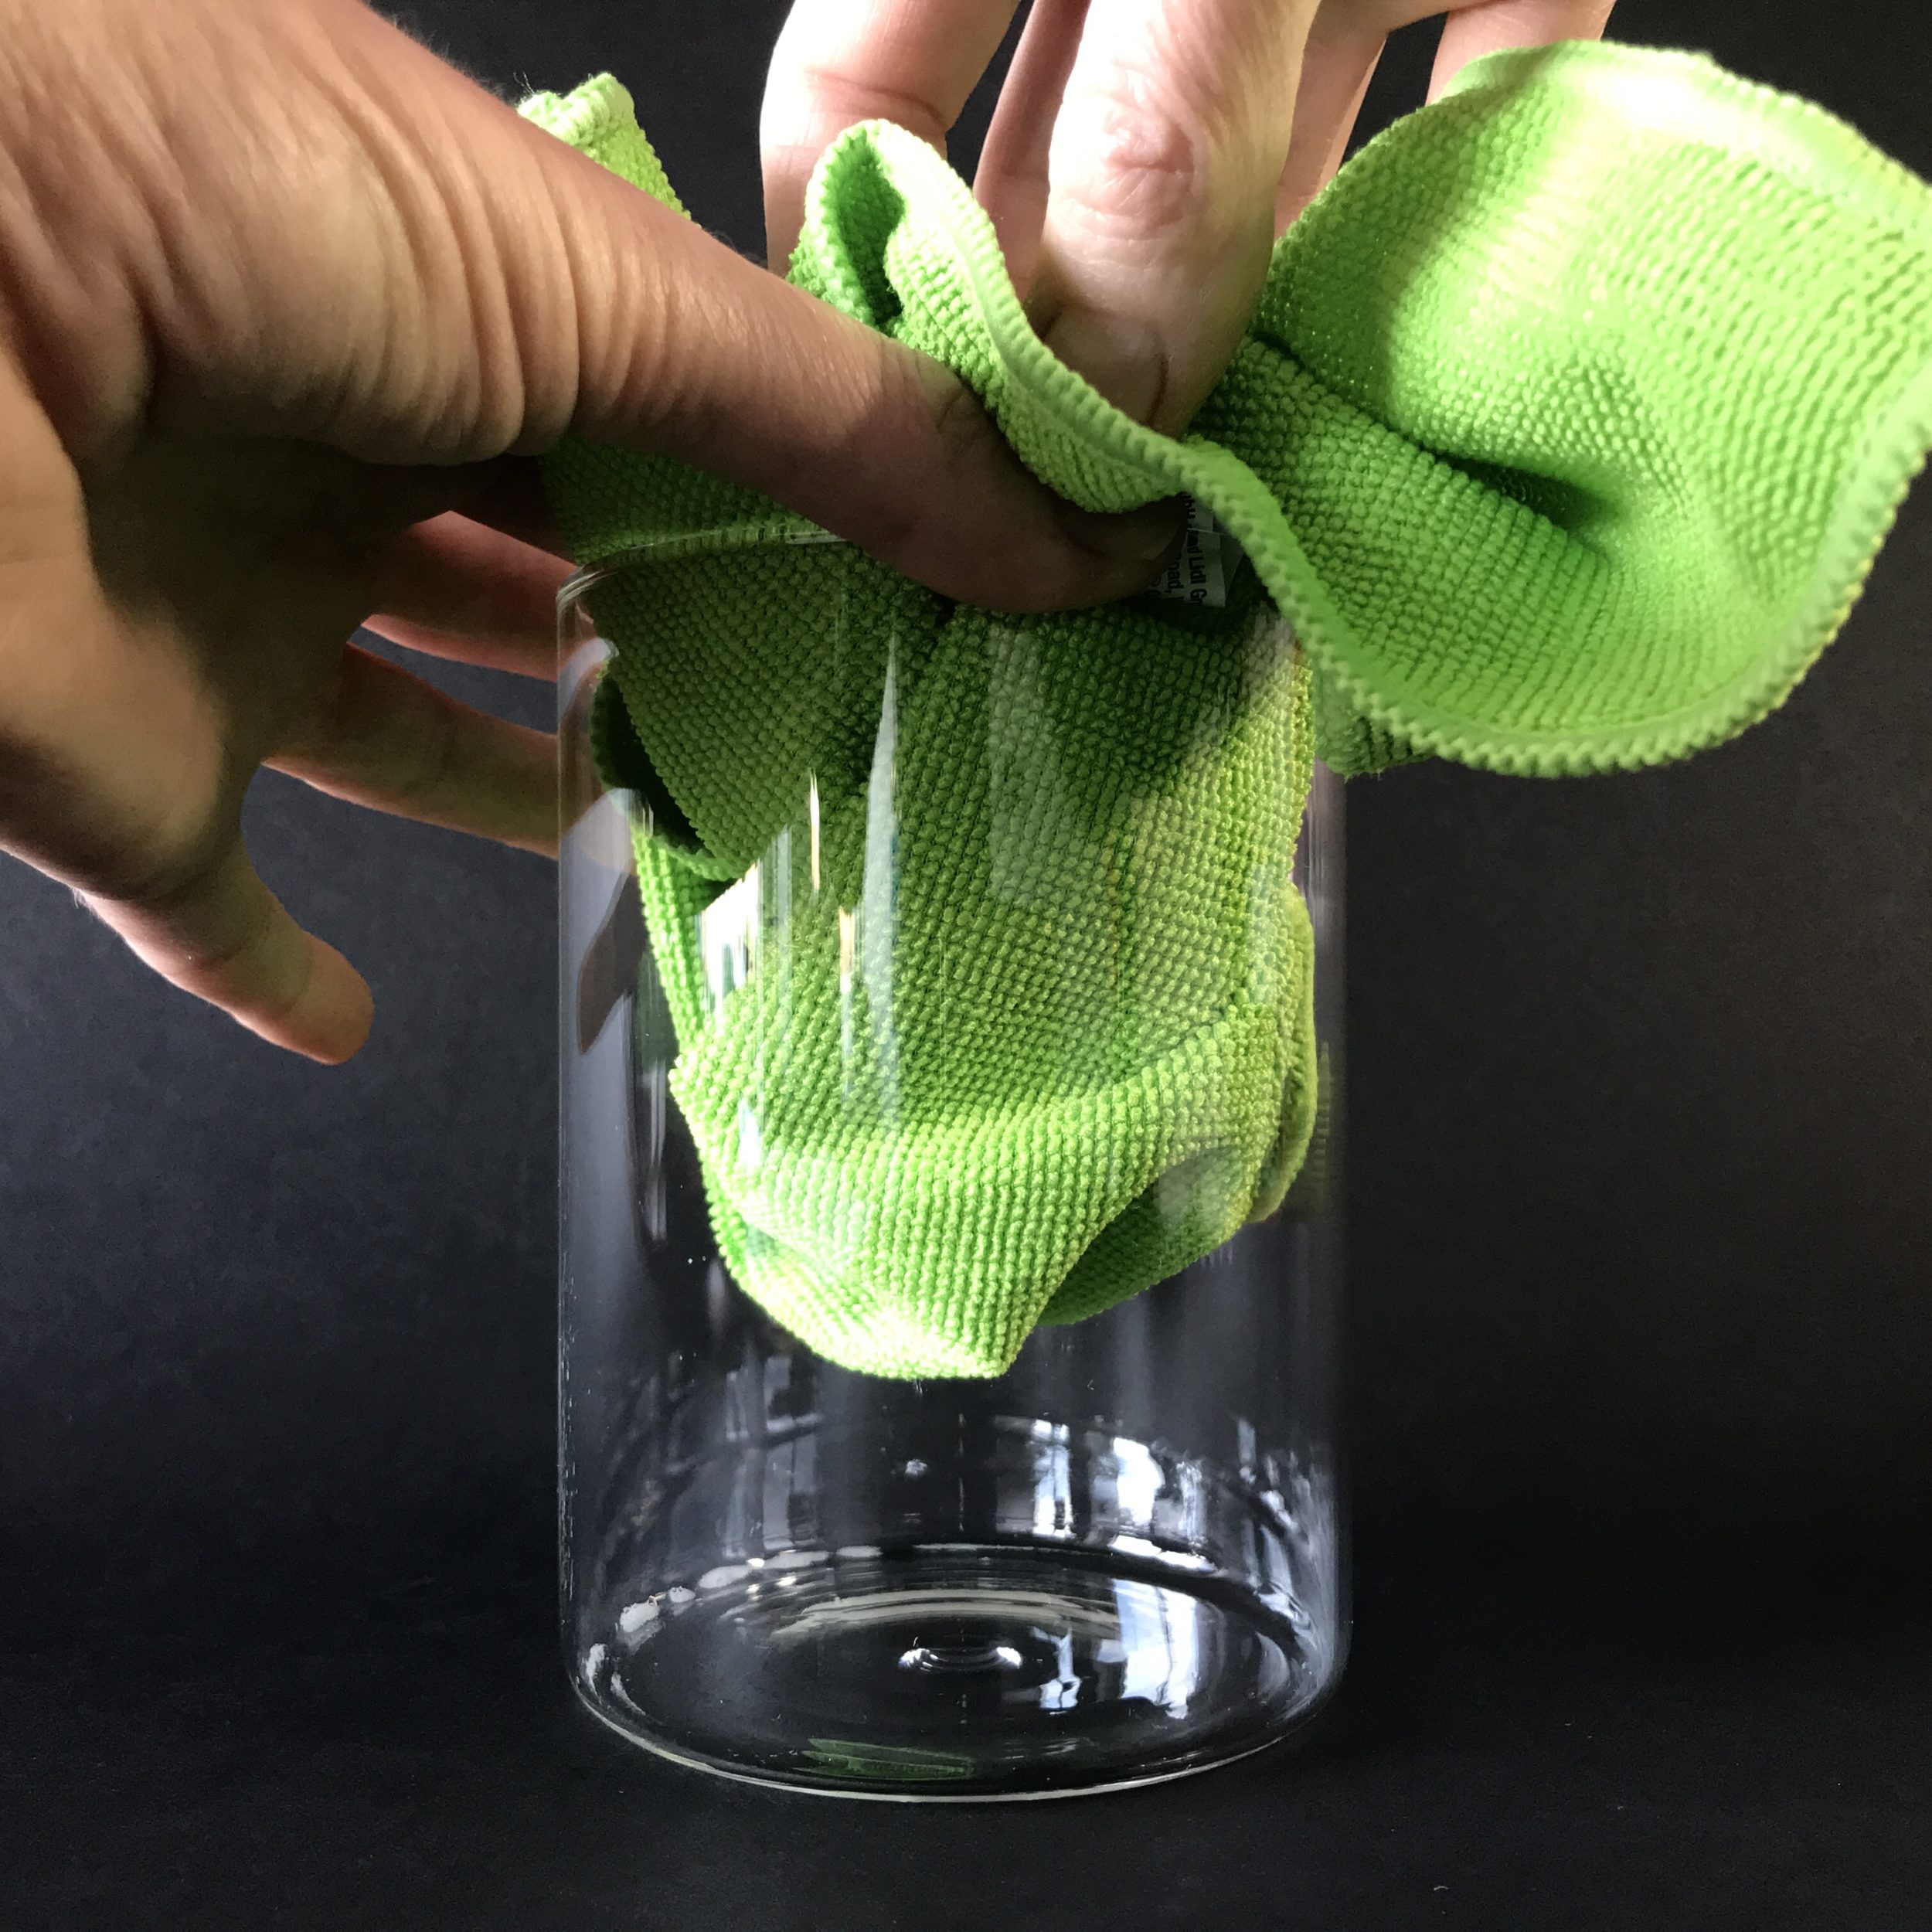
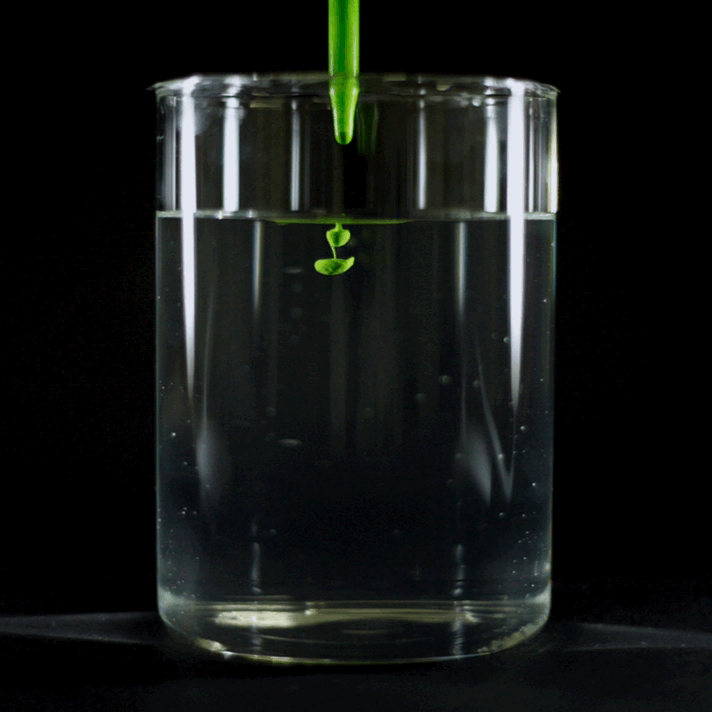
Using window cleaner and a micro-fibre cloth, make sure the glass is spotlessly clean. Then fill it with very cold water. The cold will slow down ink movement.
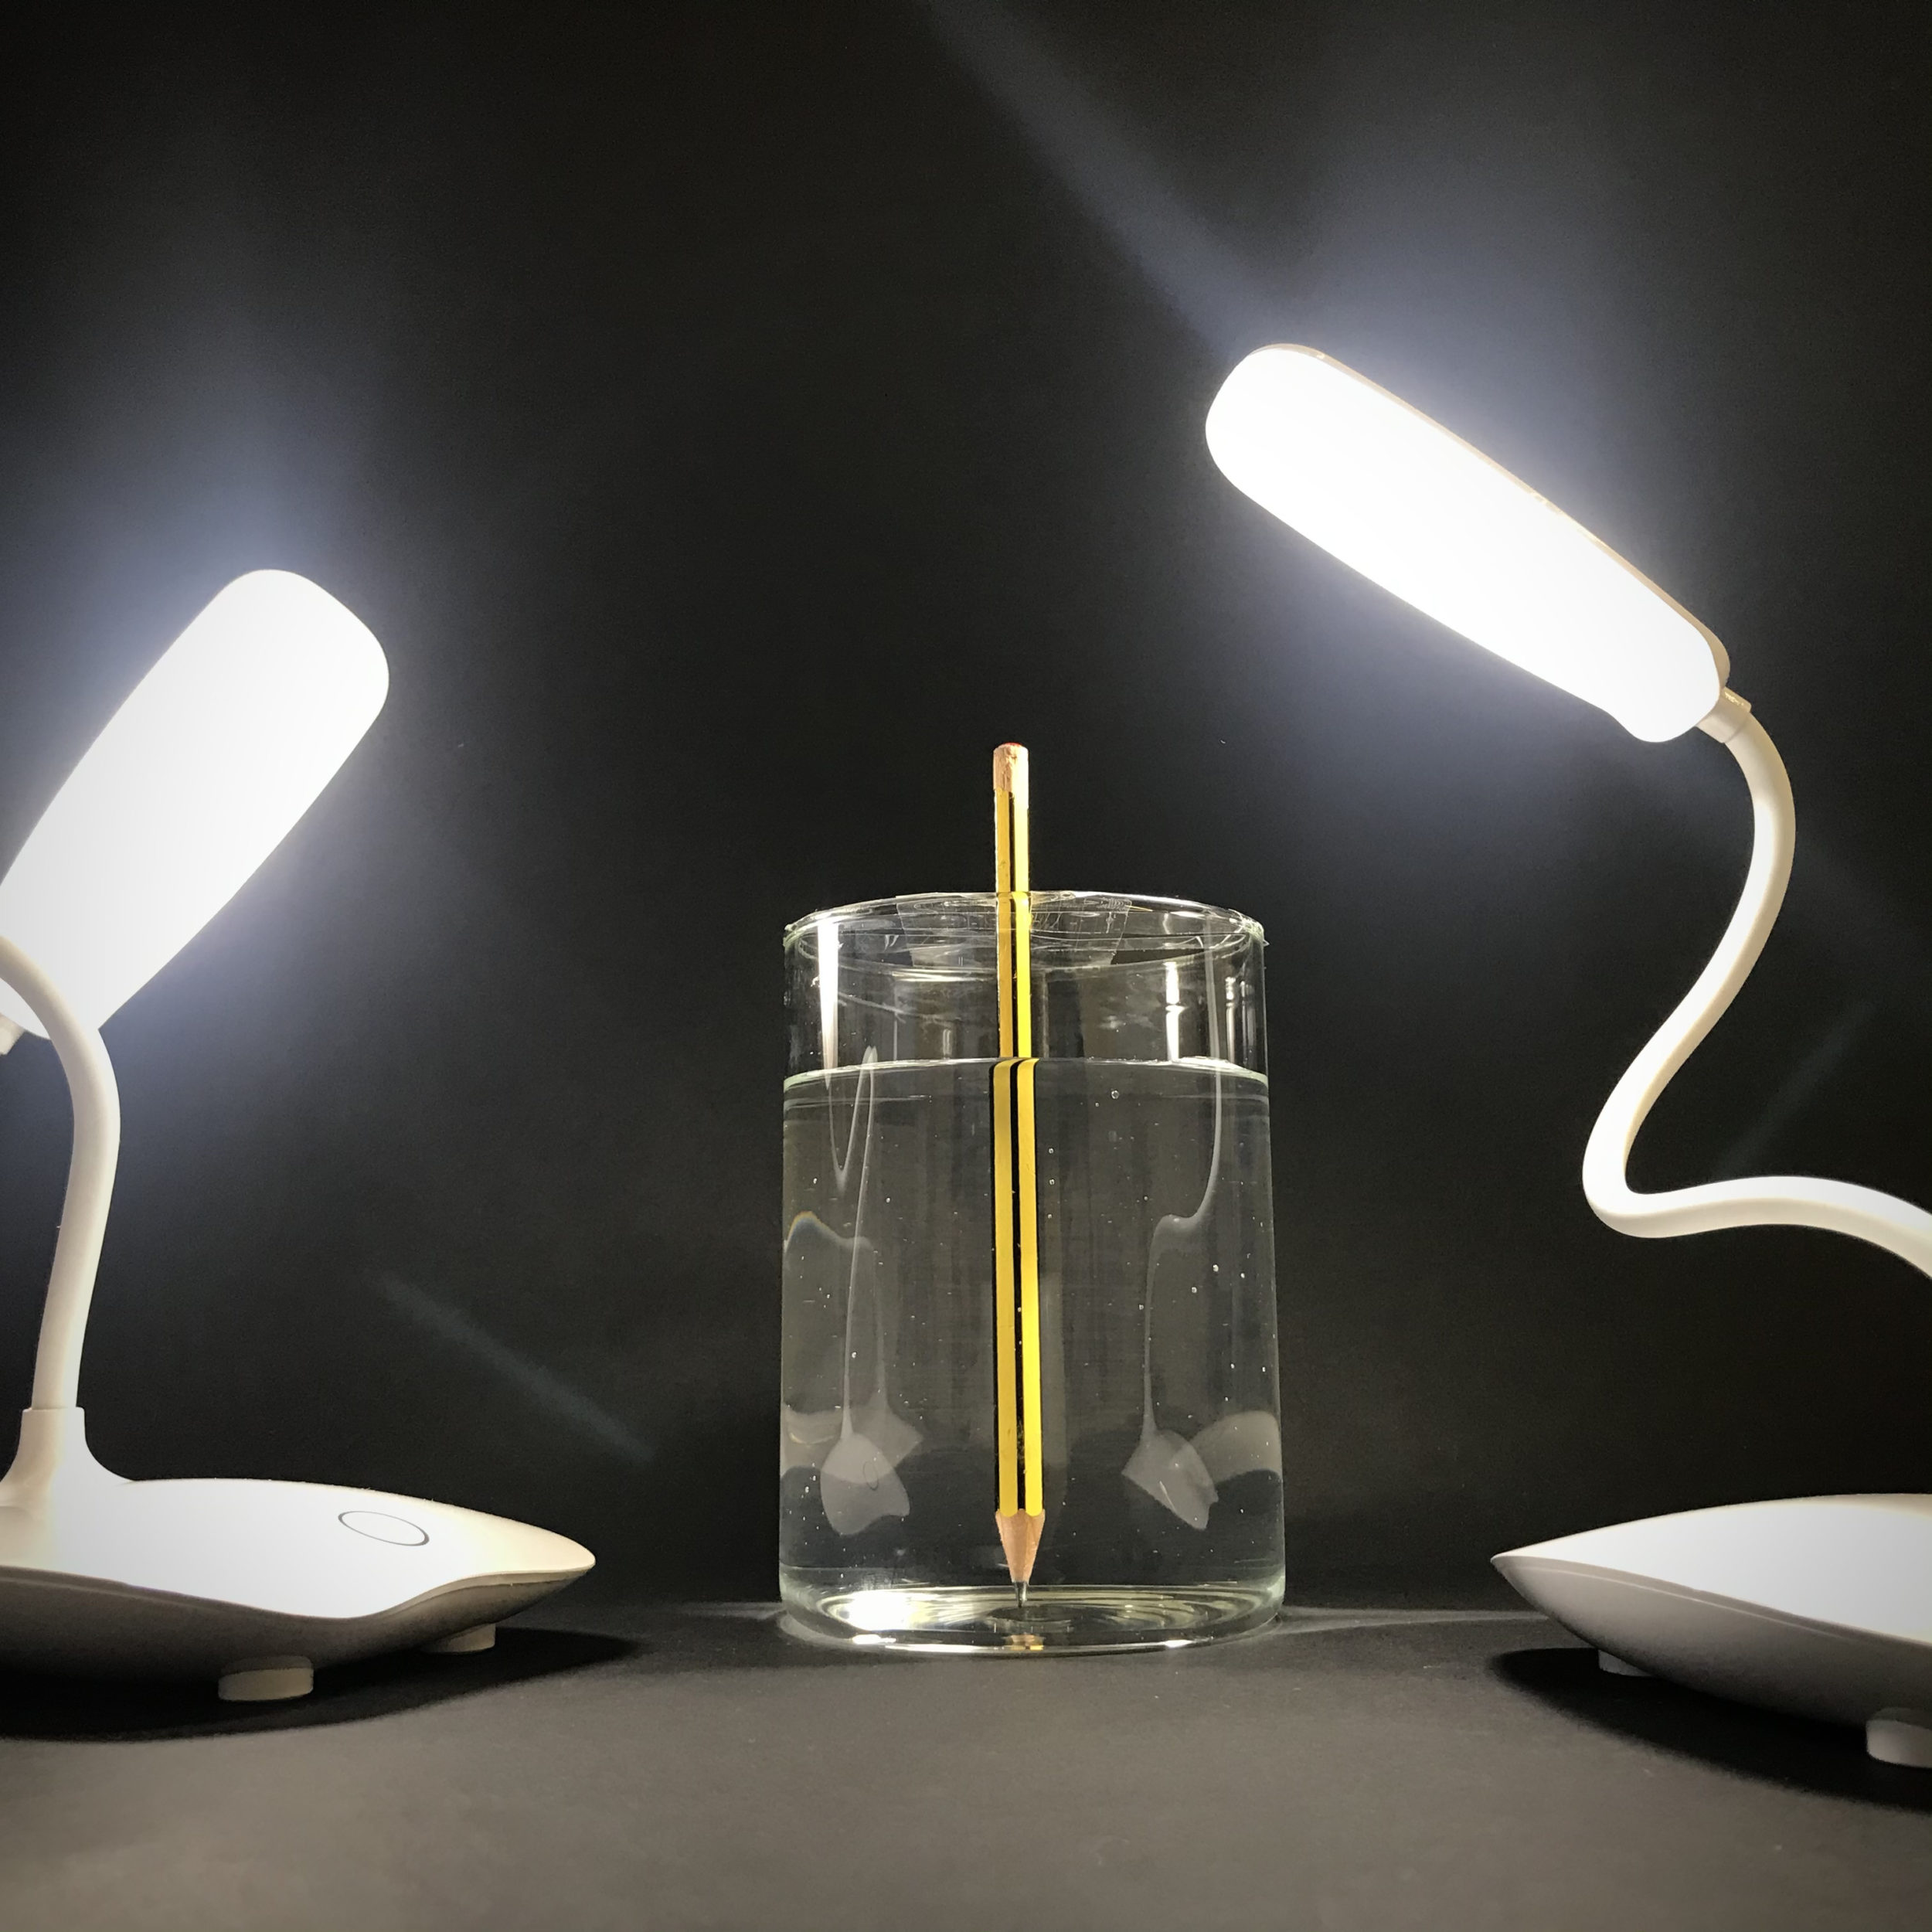
Create a grid across the top of the glass to hold the pencil in place as focus your camera, and then the pipette as you squirt in the ink. Stretch two pieces of tape vertically and two horizontally to create a central hole to hold a pencil in place. Trim off the tape to keep the edges tidy.
Position the lights on either side of the container. Try to avoid reflections in the glass whilst illuminating the pencil as much as possible. Put your camera in a steady position (use a tripod if you have one or rest the camera on a steady surface).
Position the container in the centre of the shot. Focus on the pencil in the water and use manual focus to ensure it doesn’t shift when you take the shot. Choose a fast shutter speed (at least 1/1000). Set the camera to continuous shoot mode – to capture multiple images as the ink disperses.
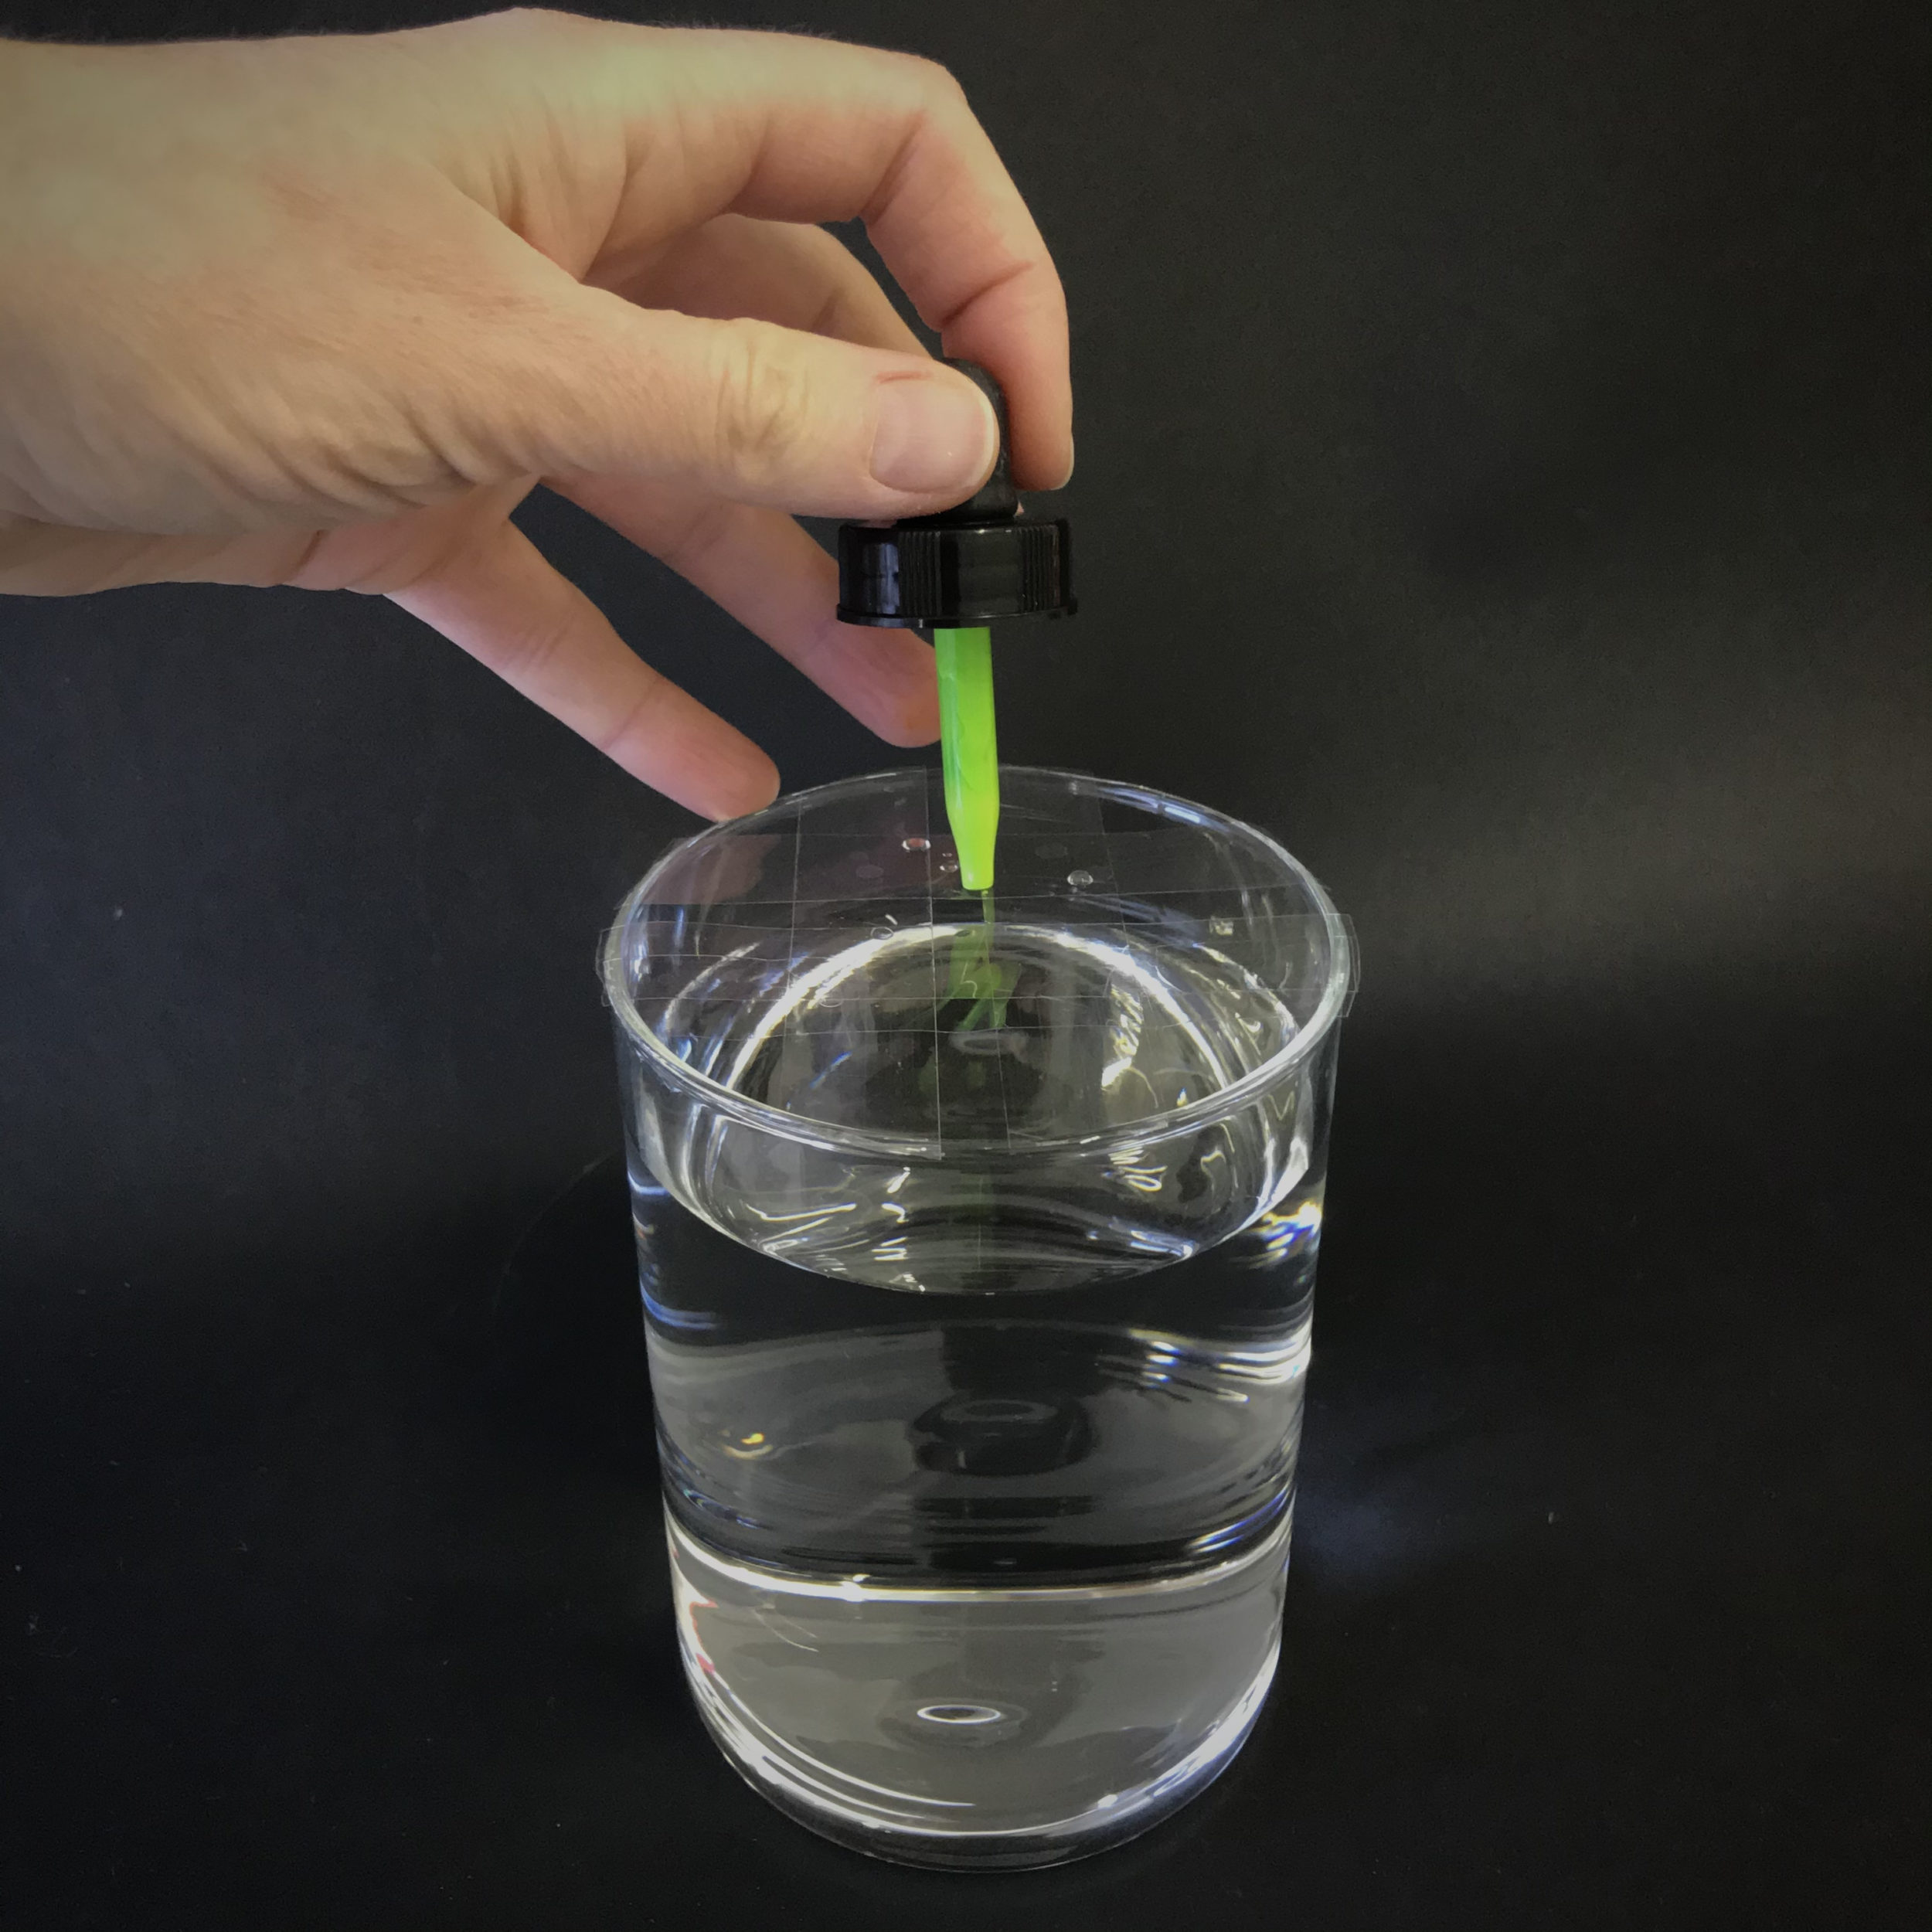
Load up your pipette with ink. Remove the pencil from the grid and replace it with your loaded pipette. You could try using two different colours at the same time if you want to.
Using continuous shoot mode, take photographs until the ink has settled at the bottom of the glass. Then try adding a second and shoot again. This is where working in pairs would be best. One squirts the ink while the other hits the button.
Review your images and select your favourites. Crop and edit your images if you want. Getting the right focus and lighting can take a little time. If your first attempt doesn’t work, wash out the container and try again.
Share your photos with us! Send us your photos by email or DM us on instagram @photoworks_uk and add the hashtag #inkclouds